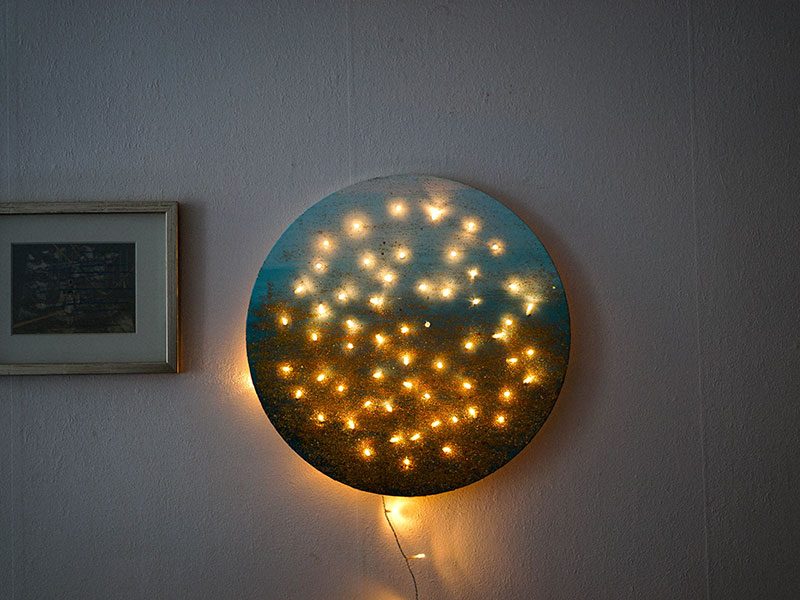
Have you seen those decor canvases that have LED light patterns in them? We’ve seen them in stores, of course, and in homes, in nurseries, cafes, and pretty much everywhere. This tutorial to make your own version requires only a few tools to create rad, personalized wall decor with the same LED-lit concept. All you need is some blank canvas, acrylic paint, LED lights, and some inspiration.

The beauty of a DIY canvas light is that you get to design it yourself. So if you have a pretty specific aesthetic — minimalist, pop art, or rustic — you have the free rein to make your project blend in beautifully with the rest of your home decor. They also make neat and easy gifts for your crew. Canvas lights can go especially well in a children’s room, as they can also serve as night lights to keep monsters at bay.

You will find everything you need to make your own DIY canvas light at any arts and crafts store.
What you’ll need:
- Blank canvas
- Acrylic paint
- LED lights
- Precision knife
- Masking tape
- Depending on your design, you might need stencils, paint brushes, sponges, strings, markers, glitter, colored sand, and/or other craft materials. Scour the internet (or your own home) for design ideas, and let your imagination run wild.


Step 1: Plan your design
First, you’ll want to plan out what kind of design you want to make. Get your creative juices flowing and brainstorm ideas for a canvas light design that’ll fit your personality (or the personality of the person to whom you are giving this as a gift). It’s better to sketch a few designs on paper before you buy the supplies to avoid wasting money on unnecessary items.
Some ideas to help you get started: a starry night sky or your city’s skyline? You can also go with something more abstract, and add in an inspiring quote from your favorite author. If you’re not comfortable with your painting skills, you can also print out a simple design and use it as a stencil for the canvas. Just tape the stencil onto the canvas so it doesn’t move around while you paint.

Step 2: Get painting
Once you’ve gotten the things you need, it’s time to start getting messy. Choose a well-ventilated area to do your painting. Lay down some rags, old towels, or a bunch of newspapers on your workstation to protect it from paint stains. Then, using your design sketch or stencil, start drawing and painting on the canvas.
Acrylics are one of the best types of paint for canvas. They are water-based paints, so feel free to dilute your paints in some water if you want to thin them out a bit for your project. You can paint them to look like watercolor if you dilute them in enough water. There are also a variety of painting techniques that you can use with acrylics to achieve your desired look. Use paintbrushes, sponges, strings, or even your hands and fingers to create different textures and styles. You have to remember that acrylic paint dries fast though, so work quickly but carefully.

Step 3: Poke holes in the canvas
Wait for the canvas to be completely dry. Even if acrylic paint dries quickly, if you have several thick layers, it’s best to wait a little longer. Turn the canvas over and search the area for the places where you want each light to go. Use a pencil to mark off dots for the lights. If your design requires each light to be in a specific part, you can try using a pin or needle to poke a tiny hole from the painted side of the canvas to the other side before you mark it off with a pencil. That way, you can be sure that you’ll poke a hole through the right places.
Once you’ve finished making pencil marks for the lights, use a precision knife to poke a hole through each spot. Start small; it’s easier to make a bigger cut to fit the lights than it is to make a hole smaller. Test out the first hole with one of the lights to see how small or big you should make the cut, before moving on to the others.


Step 4: Add the lights
When you’re done cutting holes in the canvas, push each light through the holes. Do not push it all the way through — just enough for the bulb to show at the front. Secure the lights at the back with masking tape.


Step 5: Hang your new masterpiece
Once the last bulb is taped, voila! You have your very own canvas light. Fasten a piece of sturdy string across the canvas and hang it up on the wall. Plug the lights in and see how they complement the art. If you used battery-operated lights, you can do away with electric cords and tape the switch at the back of the canvas. Then step back and admire your handiwork.
If you’re giving it as a gift, place it in a nice box with some ribbon and a note to the lucky friend. It’s a work of love, as well as a work of art.


