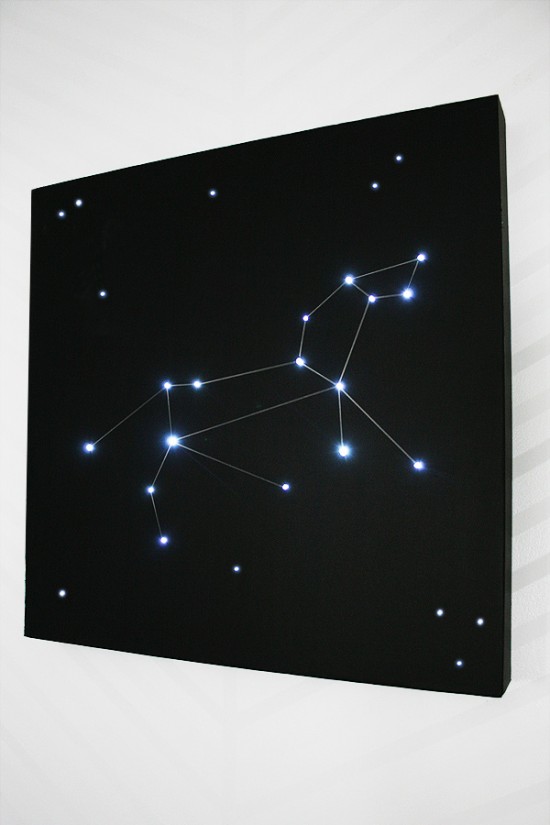
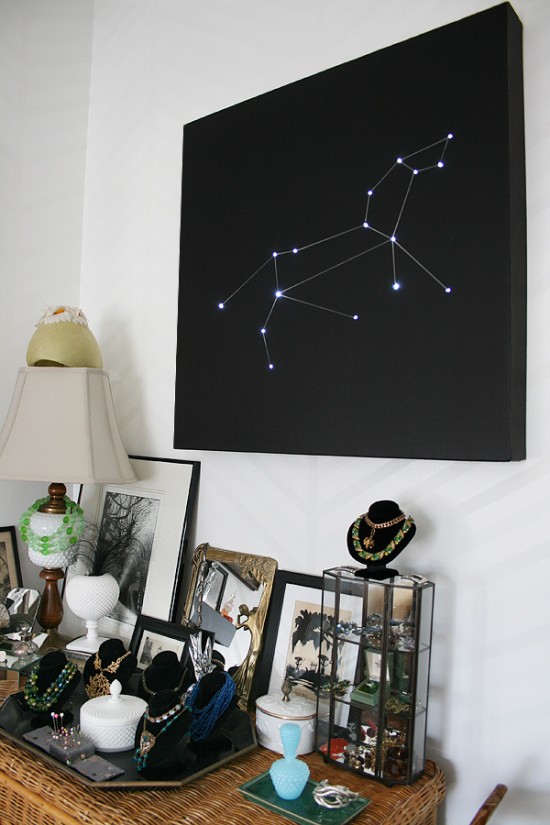
Evita’s been sharing her tutorials on Offbeat Home all year — remember the starry window pelmet? Or her sewing machine-cum-computer-desk? She RETURNS! And you’ll be thrilled.

Materials you need for this constellation light project
- Black foam board
- Battery powered LED lights
- Box cutter/X-Acto knife
- Hot glue gun
- Awl/screwdriver
- Silver Sharpie
1. Find the constellation/art you want to use. We found our Leo on Google. Size it up to your desire. If it’s larger than what your printer will print, you’ll need to use a tiling program to print.
If you have access to Adobe Acrobat, you’re good to go (that’s what we used). There are free tiler programs online like Tiler and PosteRazor.
2. Save it to PDF format and print.

3. Lay out your printed design and tape them together. Place the ‘map’ on the piece of foam board that will be the front of the light box.

Using a small awl or other piercing object, make a small hole in the center of each star. Lift the ‘map’ and put it to the side. We used a silver Sharpie to lightly highlight the starter hole.

4. Finish piercing the holes. Start small. Using your map, adjust the size of the holes to mimic large and small stars. Some of the larger holes may require a larger piercer, such as a screwdriver (or larger awl). Add silver lines in the front, connecting the stars.
 5 lamps you can handmake to add sculptural surrealism at home
Cheap good lamps are hard to find, am I right? I've been on the search for them in big box stores, clearance aisles, antique shops,... Read more

5. Build your box. For the switch, we put it on the lower left side corner and cut a section out of the foam board.

5. Lay out your lights. Depending on your artwork, it may take two strands.

7. Make a circle with the hot glue around each hole and push the light down. Hold and let set.

8. Hang your new art and enjoy!


Fwaahh this is gorgeous! There are so many things to do with this idea, too ..
I love this!
So cool and simple!!! I want to do this NAO. Make me a Lepus constellation for our Bunny-Hutch.
PS: Evita’s jewelry table is DROOL-WORTHY THAR!!!
Thank you! 🙂
This is really cool! Thanks for the tutorial. <3
It is like a grown up lite-brite!
Holy crap. I need to make this this weekend!!!!
Thanks so much Cat for featuring this! If anyone has any questions, please feel free to ask!
Hi great tutorial but how much foam board and led lights do I need? What did you do with the ones that you don’t put through the wholes? And what did you do with the back to hang it. I could figure it out myself but I really love your dimensions and would like to make this as a gift. Thank you for your answer and super great job
Do the lights end up poking all the way through the foam board then?
Very cute. I’m running to Target now to see if they have any battery operated Christmas lights still on sale! (this would be great to feature on the day after Christmas.)
They don’t actually. The LED bulb is very small on the strands we purchased.
This is so amazing. I think we need one. Or two. ^^
Cygnus has been my favorite constellation for awhile now. I’m showing these plans to hubby, I have hope he’ll respond positively to our making this.
I love this! I really want to make this for my nephew (he has a space themed room) but I am confused on how you built the sides. Can you break down the “Build your box” step for me? Thanks!
Hi Carrie,
We hot glued the sides and edges together. The foam board is light enough to support itself at that stage.
Thank you!
This is so awesome! Thanks for the tutorial!
My six year old son’s name happens to be the name of a constellation, so I am DEFINITELY making one of these for his bedroom, he’ll freaking love it!
My son’s middle name is Orion, and I’m also definitely going to make him one of these! Yay constellation names!
Beautiful! I was going to do this with a dandelion pattern and I never thought of step #5 to easily turn on and off the box. Thanks for this great tutorial
Thanks very much for this idea and tutorial – we’ve been looking at it for a year or so and finally made our Stegoplodocus Rex light last night and we LOVE it 🙂 thanks!
Ugh. This is just so crazypants amazing. I will be making this no doubt very soon.
Hi
This is very beautiful and creative – can I just ask though – is it totally safe? Isn’t foam board highly imflammable?
I’m sure it would be safe as long as you check that the material you use is flame retardant.
Hello, I am going to make this for my boyfriend for our anniversary and I just have some questions. How many inches did you cut off from the sides before you hot glued them back on? Or did you use a separate board and cut that (but again, how many inches did you cut off)? If you could just explain how you put the foam board together that would be helpful. Did you pull the bulbs out of the ones you didn’t use or just leave them there?
Thank you!