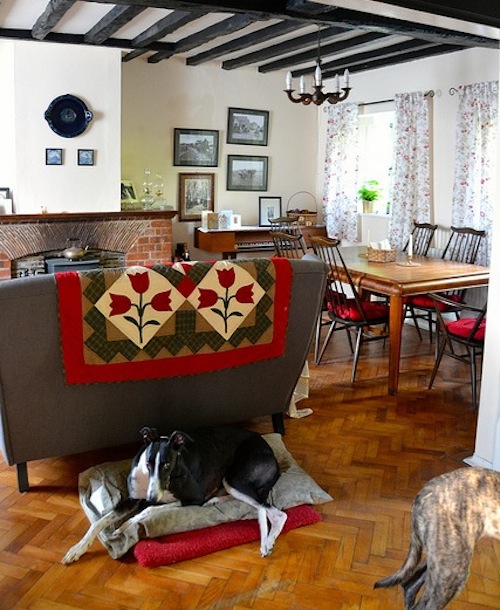
 When we were getting ready to adopt our two ex-racing greyhounds, I bought a flannel duvet cover at a charity shop, studied a couple of pillowcase patterns, and made these giant pillows.
So far, the hounds love them! They’re also really easy to wash.
This is my step-by-step tutorial for making a large puppy bed in a pillow shape, out of an old duvet cover and duvet. Only beginner sewing skills and supplies are required!
There are a lot of steps, but that’s just because I’ve documented every little action. Measurements are in centimetres; most sewing tapes should have inches on one side and cm on the other. No calculations required.

Supplies:
- King size duvet cover (cotton or flannel)
- Single size lightweight duvet
- Tape measure
- Sewing pins
- Scissors
- Permanent marker or sewing pencil
- Scrap paper for planning measurements
- Steam iron
- Sewing machine
Step-by-Step:

 How to get costumes for cheap-as-free
National Costume Swap Day!!!!!!! ...Which I had never heard of before this year, but isn't it a brilliant idea? People around the world organize swaps... Read more
Step 1:
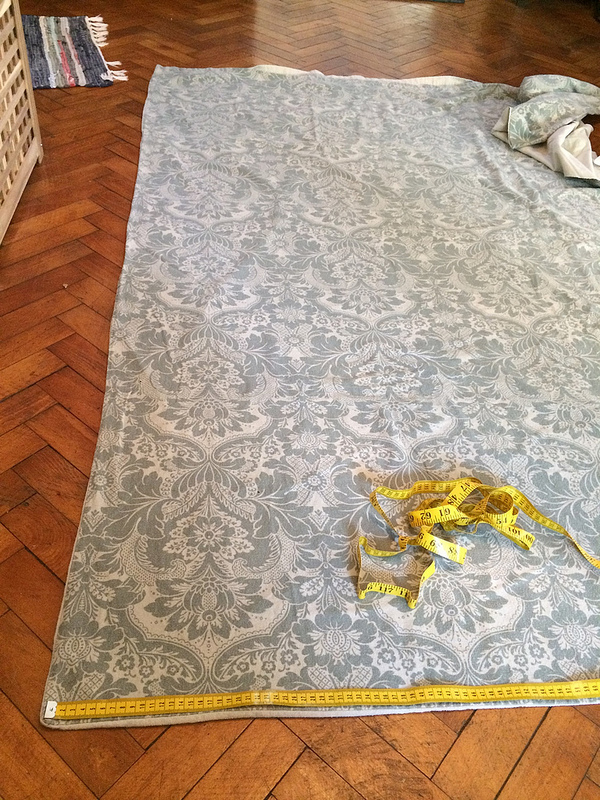
Lay out your cover material in a big flat space. Measure your length and width and mark where to cut. I marked 112cm (the middle) for the length and 75cm for the width. (1 king size duvet cover = two puppy bed covers)
Step 2:
Cut your fabric. Remember that it’s a cover, so the fabric is in two layers, which might shift against each other when you cut. Once it’s cut, turn the two layers inside-out, so their “right” sides are smooshed together.

Step 3:
As you can see, my cover has a different design on each side. One of these sides will form the tucked-in pocket to keep the insert in place. That’s Side A. The other will be the top of the finished bed. That’s Side B. In my case, I decided to make the plain fabric Side A, because I wanted the damask-patterned fabric on top (Side B).
Step 4:
Also, since we’re cutting from a pre-made cover, two of the edges of the rectangle are already sewn together, one of the lengths and one of the widths. We’ll be working on the other edges of the rectangle, the unsewn length and width.

Step 5:
Measure 17cm inwards from the un-sewn width of the cut rectangle.

Step 6:
Open the seam along the length to the 17cm mark, so along that distance, the two fabrics are free of each other.

Step 7:
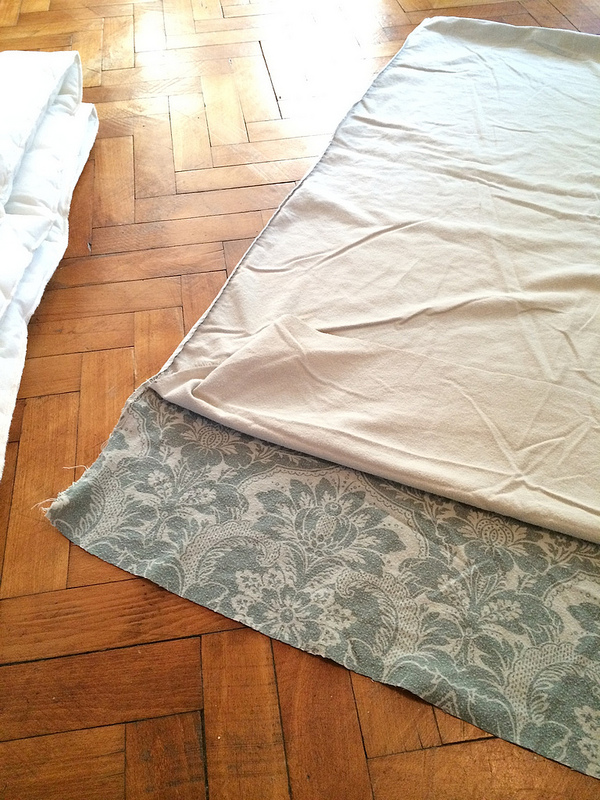
Cut the Side B fabric across at the 17cm mark, so that you have one side that is 17cm longer than the other. You can see how I’ve folded my Side A fabric back to expose the margin that I’m going to remove from Side B.

Step 8:
Lay your fabric out with the two sides separated on your stable and safe ironing surface. (Mine is a 1930s ironing board with a Mexican block print tablecloth cover. Please ignore my ugly kitchen floor!) Now we’re going to hem the opening of the cover, so this is all done on the unsewn width of your rectangle. I’m starting with Side A.

Step 9:
Turn your iron on to pre-heat. Make a 1cm fold in the Side A fabric and iron it flat. Might need a few pins to hold it in place while you iron.
Step 10:
Fold it over 1cm again and iron. Pin it in place to secure.
Step 11:
Move the fabric so that Side B is ready to iron on the un-sewn width of the rectangle. Fold 4cm over and iron.

Step 12:
Repeat the 4cm fold and iron. Pin it in place to secure.

Step 13:
You should now have two hems ready to be sewn. One on Side A is 1cm thick and one on Side B is 4cm thick.

Step 14:
Sew your hems, keeping to the inner edge of the folded part. There will be two rough edges where Side A is longer than Side B. Don’t sew those parts yet.

Step 15:
Take a tea break. This is going pretty well! (I’m enjoying some Lapsang Souchong.)

Step 16:
Bring your fabric back to the ironing board. We’re going to make the tucked-in pocket. Measure 15 cm inwards on Side A and fold it. Make sure that you’re folding so that the “wrong” sides of the fabric are together (i.e. you’ll see the smooth side of your hem facing up at you, not the folded side of the hem.)

Step 17:
Iron the fold in place. Unfold it gently, and you should see a crease. (What would be a “valley fold” in origami.)

Step 18:
Turn the fabric over so that the crease is pointing up like a ridge. (A “mountain fold” in origami.)

Step 19:
Lay your Side B against Side A such that the hemmed edge is running right along that ridge and the “right” sides of the fabrics are together.

Step 20:
Now fold the margin of Side A over the top of Side B, so that Side B’s hem is completely tucked under.


Step 21:
Pin the unsewn lengths of both sides together, including the part where Side B is wrapped in the margin of Side A. Pin the other rough bit where the margin folds over on the opposite length edge. It should only be as long as the margin (15cm).
Step 22:
Sew these pinned sections together. Once they’re sewn, fold the cover right-side-out and admire your handiwork. Side A should tuck under Side B at the opening of the cover.

Step 23:
Fold the single duvet insert once lengthwise and once widthwise, to make a rectangle that’s the same size as your new cover.

Step 24:
Stuff that cover!

Step 25:
Find a cosy place to put it and watch your puppy settle down for a nap. My gigantic hound Eachánn loves a soft place to curl up, and these beds are his favourite!


Is a duvet different from a regular comforter? I’ve never had a duvet but I have a comforter I’d like to get recovered to make washing easier. I do like the idea of using one as a dog bed – as would my dog, I’m sure, since she likes to lay on our comforter when it falls on the floor.
Hi, elle! I think a “duvet” is the same thing as a “comforter” … basically a puffy fibrefill blanket with a cotton or flannel cover that is used as a warm bed covering in wintertime.
You can totally use a duvet cover to cover a comforter. I did this for a comforter that I had that was getting a bit worn along the edges, but that I couldn’t justify just throwing out (it seemed wasteful for something that was still fulfilling its purpose).
Oooo! I also made a dog bed, but yours looks way nicer than mine. Next time I will follow this for the outer covering.
I cut apart an old mattress pad to make a cover for a piece of foam. Then I just sewed a giant pillow case out of fleece to put over that. The mattress pad protects the foam from dog smells, but the outer covering is easier to take off and wash more frequently.
That’s a great idea for a filling! I might use your foam & mattress pad technique next time. 🙂
My Great Dane & my Yellow Lab think you are awesome right now…they’ll be getting cozy new DIY beds this weekend! Thanks for sharing this.
Yay!!! Cosy naptimes for everyfuzzy!
I’m more interested in that beautiful tulip quilt! Did you make that as well?
No, my mum! She is a quilt virtuoso. 🙂 I only wish I could be that talented at sewing. Are you a quilter? I could ask about the pattern; she made that one about three or four years ago, for our previous house in Holland.
I used to quilt but I gave it up in favor of knitting. ( Meaning I don’t have time to pursue both! )
Yes! Love the beds. I want to make some for my English Mastiff. Also, crib mattresses are another alternative for a large breed. Could make covers for those also!