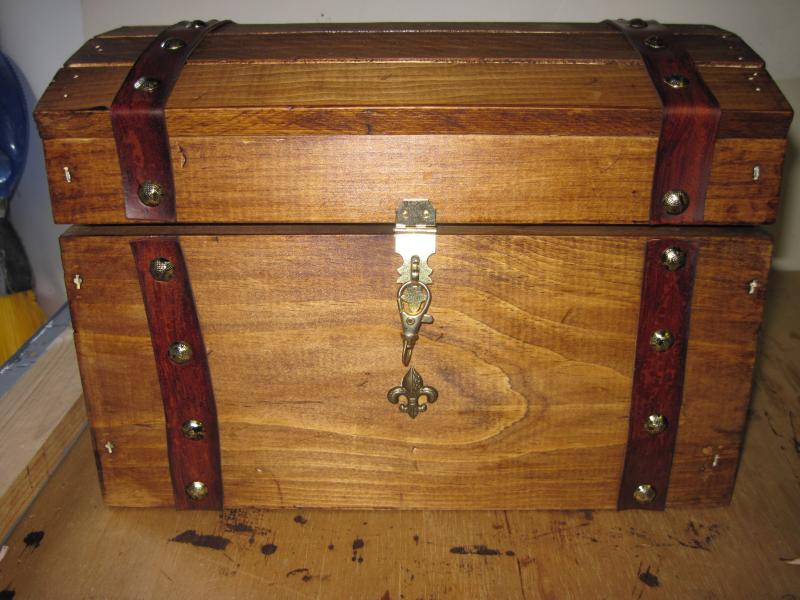
 I decided to make a little treasure chest. I think my grandfather, who used to make things like this for fun and as gifts, would be very proud if he were alive today. I almost felt him watching over me as I made this, which made it very special. And here’s how I pulled it off…

Supplies:
- Unfinished wooden chest from a craft store
- Minwax Polyshade wood stain (Vintage Oak)
- Old rag for staining box
- Unfinished veg tanned leather kip
- All-in-one leather dye in tan
- Cotton daubers for leather dye
- 220-grit sand paper
- Upholstery tacks
- Small brass hinge
- Hammer for attaching leather and hardware
- Household super glue for attaching the Fleur de Lis

Step one: Weathering the box. I sanded the rough edges, hit it with a hammer a few times and rolled it around in my backyard so it didn’t look too “perfect.” (This photo was taken pre-weathering.)

Step two: Apply first coat of stain and dye.

Step three: Apply second coat of stain and dye, then attach any hardware with finishing nails.

Step four: Attach the leather strips with upholstery nails. You can also sand the edges of the leather to make it look a little worn.


Step five: Finish with a little fleur de lis, or whatever extra flourishes you’d prefer.
Now the only question left is… what kind of booty would you store in YOUR mini treasure chest?


Cute! To help make it look more weathered, I’d take a fine point paintbrush (or general small paintbrush) and some black paint, then go into the spaces on the top of the chest, and maybe around the edges a bit. Then wipe it with a cloth or sponge so it isn’t too dark. I think it’s called patina (or maybe that’s just for making metal bits looks old).
I so wish you had pictures of the “beating it up” process… that sounds like so much fun! This turned out really nice.
We adapted this for our wedding as a card box. I love the addition of the leather–it gives it so much character.
Just wanted to say that I think this is incredible!
We did the exact same thing for our wedding:
http://wedding.dementedcreations.net/Pictures/treasurechest.jpg
(We expect our pro pics in the next week or two – this is the only one we have so far.)
We used Red Oak stain with a clear gloss over it, we also used furniture tacks for the top, and we got corner protectors, decorative hinges, handles, and these awesome butterfly latches that I wish I had a close-up picture of. We started out with the exact same chest!
I will warn people – if you are picky about the style and color of your hardware, it can be difficult to get exactly what you want without ordering online, which can get expensive.
This is awesome. I wonder how much of this process could be transferred over to making a realistic-sized treasure chest? (Because linen closets are BORING, duh.)
I want to for this just to say I’ve got junk in the trunk.
(Also, it looks pretty friggin rad.)
This treasure chest looks beautiful! I`m trying to make something similar for a project! I was not able to find the wood stain color you used, i was wondering if you could suggest something that is very similar in shade. Thank you!! 🙂