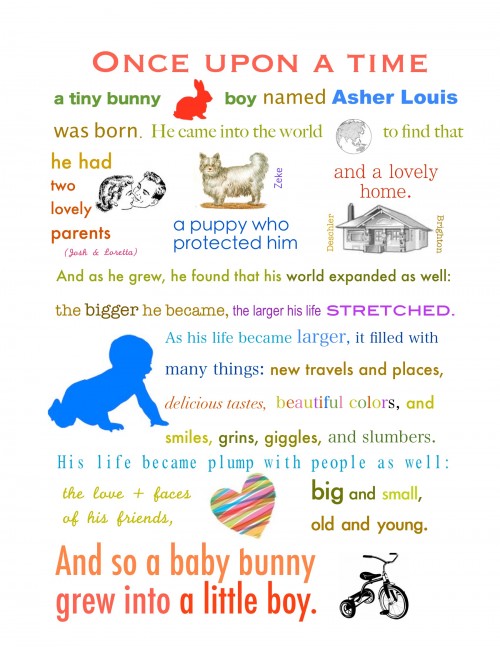
The favorite little person in my life (not mine, but a friend’s) is turning one soon, and I really struggled with figuring out what to get a one-year-old. When it comes to gifting for people, I generally want my gift to be:
- purposeful (they should be able to use it for at least a bit, no clutter contribution)
- pleasing to the recipient
- personal (it should be clear I got/made it for them)
The particular child I had in mind doesn’t need a) clothes or b) toys. Both are rampant in the house. So as I thought about it, the Mr. pointed out that first-year birthday parties are as much for the parent as the child — good point.
And I’m pretty frugal. Which is another point.
But I’m creative! And I love this little guy! And thus, I thought, I’ll make him a digital print. More specifically, a story about him. And it will be pleasing to the eye. His mom and dad will enjoy it now, and he can enjoy it later. It will hang in his room, and as he learns to read, it will be something he can practice on.
What you need
- computer
- access to color printer
- good paper
- frame
My total cost: $9.
Writing the bio story
One-year-olds haven’t done a lot, but you could really go into detail here, citing what month they reached benchmarks at, describing their first food, etc. For the trajectory of my story, I wanted to keep the timeline open so that he could refer to this as a small child. And I wanted to focus on marking what a lovely life this guy has (awesome parents, great dog he loves, lots of parents’ friends who adore him), and I wanted to recognize that my friend has just moved from one beloved home to a new beloved home. From there, writing the story was fairly simple.
Making it pretty
Using Pages, the Mac hybrid of Word and Publisher, I pulled different pieces of the story into different textbooks for optimum adjusting. Even if you’re not super computer savvy, this was simple. Then I played with the fonts to get them to pop. A shorter story could have been more fun: more sideways words, diagonals, size contrast. As is, I had some limitations. If you want to go more extreme with the visual elements, keep it shorter.
Using different text boxes also allowed me to move things around with photos a few different ways.
Finishing it up
After about three hours of tweaking and editing, my print was done! I printed it a local copy shop on card stock (because my printer is too jacked for the job) and popped it into a frame.


Great first birthday present!
I love this! I couldn’t think what to make for my husband for our first wedding aniversary – this is perfect! Especially given it’s traditionally supposed to be a paper gift!!
Great idea! Thanks for the directions. I’m feeling very inspired now.