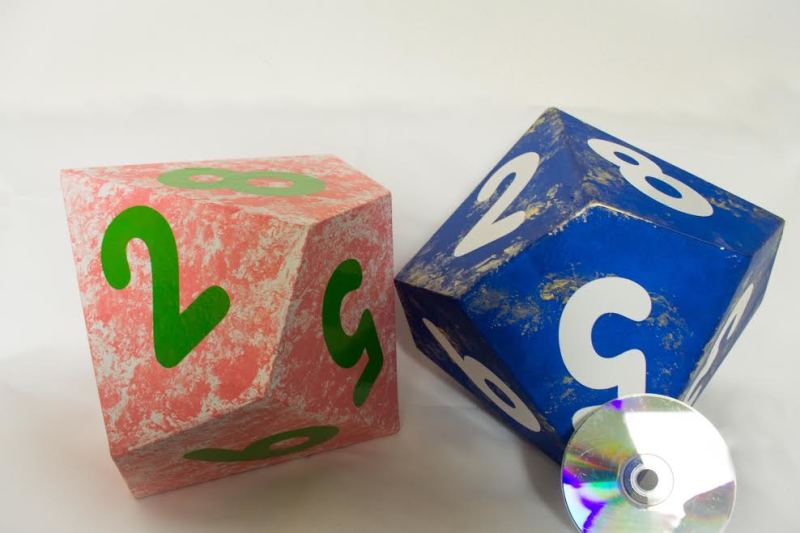
I present to you my tutorial for making giant d10 (because the giant d20 didn’t work out so well — the pattern is far more complicated and didn’t really work with the thick cardboard).
If you have questions, feel free to ask ’em in the comments.
What you will need:
- grey board (we bought this at a shop for architectural needs). The size depends on how big you want your die. We used the DIN standard a1, which is 84,1 x 118,9 cm, the board was 2mm thick.
- a really sharp knife for cutting the board (we used a box cutter)
- some kind of straight edge to cut along
- a printout of the die pattern (we used the one here) printed accordingly to fit the cardboard
- glue of your choice
- adhesive tape (masking tape works wonderfully!)
- filler (preferably in white or light grey)
- a putty knife
- acrylic paint and paint roller
- sponge or paper towels
Okay, let’s get started…

First, you need to cut out your pattern, then copy it to the cardboard. Then, with the help of the latch, cut the thing out. Be careful not to ruin your floor (like we did).
 Make nerdy coasters with Magic: the Gathering cards
We host a gaggle of nerds for a monthly Magic: the Gathering gathering, and they consume a lot of liquid. We needed coasters and got... Read more

When you’re finished, cut along the folding edges carefully. Do not cut straight through, but score the surface. Then fold the die completely (it works a lot better with several pairs of hands!).
Does everything fit nicely? Does it fold well? If not, maybe you want to score the folding edges a bit more. Then, glue it together. Use the tape to help you hold it together. Use as much tape as you need to really hold it together fast! This cardboard is stubborn stuff.

We started with one half, waited for it to dry, then we did the other half and glued the middle together lastly. Let it sit for a night so the glue can really dry.

The next day, start dressing it with filler. Let the putty dry completely (might take another day), then flatten it with fine sandpaper (sorry, no pictures of this step).


Then start painting it. You’ll need several layers of paint, so again, this might take a day or two to be completed. Once you have the base color, you can take a sponge or scrunched up paper towel and dip it in a second color to dab a pattern on the die.

After the paint has dried completely, you can either stencil numbers on, or, do as we did and use adhesive numbers.


Awesome! And yeah I can see how the d20 would be tricky.
I feel like I need to make the whole set!
I made a small d20 once, certainly nothing at this scale, it was about the size of the palm of my hand (it was a Christmas ornament, actually). I can see where the cutting and folding of the d20 would make things difficult. For mine I cut out each triangle of it individually, taped the pieces together and then used papier mache over it to make it a whole solid piece. I don’t know if that would work with something to this scale, but you’d probably be able to use a thinner board that way. The papier mache would make the edges and points a little rounder too, I imagine.