 I’ve been trying to update my guest room/study for the last two years. It seemed to me that I just needed one simple focal point — which should be the bed. I was on a budget, on a mission and working with a limited amount of space. It seemed like the best solution was to create my own headboard using fabric.
Here’s how I did it:
Find some fabric that you love. I like something with a pattern or color because this fabric will become a piece of art on the wall. Look for home decor fabric. Fabric for decorating comes in a full 60″ width (clothing bolts are only 45″ wide). (Note: Queen sized mattresses are also 60″ wide, which makes this project super easy.)
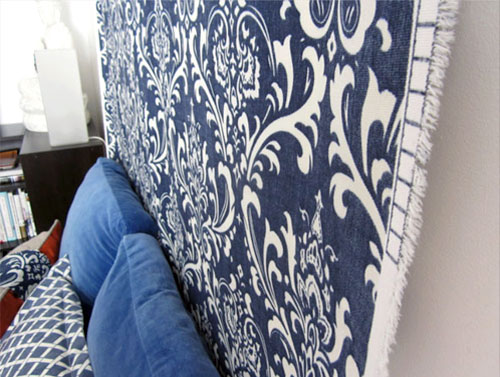
Use the full width of the fabric. I kept the look casual and didn’t even bother cutting or sewing the sides. You can still see the selvage edge of the fabric (but I think it adds character)
Cut to the desired length, leaving about 4-5 inches extra as a header and footer.
 Purge’s punk rock room: making the most of a share-house space
Purge and her fiance Fernz live in a share-house space -- but that hasn't kept them from creating an amazing punk rock bedroom hideaway, utilizing... Read more
Now for the simple sewing. Fold and sew the header. I made a two-inch header. You can fold it twice to make sure the raw edge is covered. Do the same for the bottom (but smaller). If you don’t have a sewing machine, just use the iron-on tape to fold the fabric over.
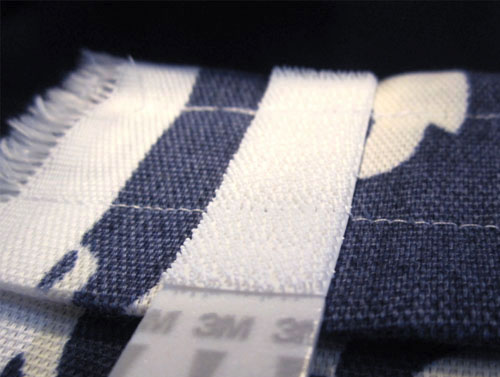
Attach fasteners. I used 3M Command picture hanging strips. You must actually sew the strip onto the header of the fabric. The adhesive will not stick to fabric. I sewed 4 strips onto the fabric and then stuck four strips on the wall. (Note: In the past, I have also used a staple gun or small nails to achieve the same effect. 3M strips are better for the wall and probably less dangerous in case something should fall.)
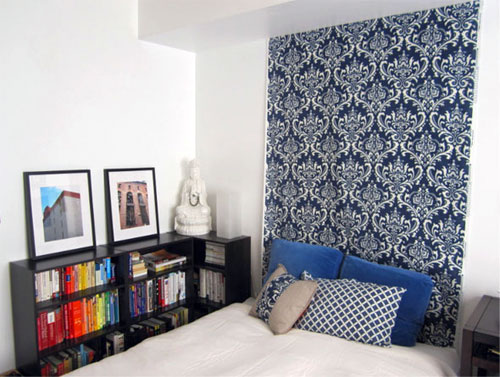
Voila! Hang your fabric flush against the wall (without causing any wall damage).
Check out how some simple fabric makes such a bold statement! It really helps to ground the bed…and the entire room.
Bonus decorating tips and tricks
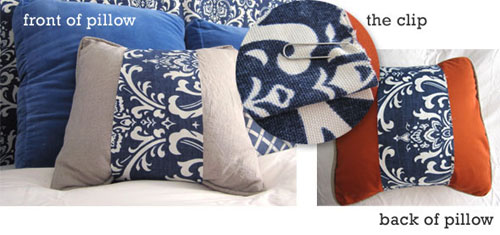
I also made some quick matching pillows for the ensemble (the two smaller pillows). For one, I made a simple sham, which is basically like sewing a square. For the smaller pillow, I did a quick no-sew job using a pillow from my living room. I turned the pillow to show the nice linen backside, and then literally pinned a “stripe” down the middle. Done!
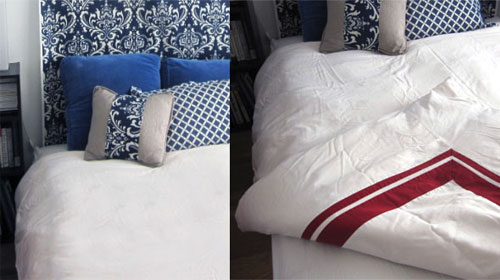 It’s always a good idea to raid your closet for sheets, towels, scarves and other items that can be turned, tied or folded into something new and fresh. I needed a white duvet, so I just used an old duvet with a red stripe and turned it over — instant new white duvet!
 And lastly, who can resist the rainbow spectrum book bookshelf?
Well done! Love it!!
Pretty! Love the fabric choice. <3 Nice idea.
Your timing is AMAZING. We were just trying to figure out how to make our boring brown bedroom look nice without $150 worth of paint.
Excellent – I’m so glad this inspired! I’m totally into the 3M command strips for DIY decor. And I love to hit up the sale section on fabric.com. Since it’s just going on the wall, the texture/quality of the fabric is less important than if you were sewing say a dress. You should let me know how it turns out!
Thank you! I have a full size bed, and I really want a nice “headboard,” but I don’t want to spend a lot because my next bed will be a queen size (for which I already have a headboard/footboard). I love the fabric idea, and as soon as I move to my new apt. (very soon), I’m going to do this.
This is AMAZING! I had no idea about the home decor fabric. LOVE.
This is a great idea. I’m planning a decorating project based on a particular wall paper, but if I can find the pattern I want in some material or a sheet, the whole thing will be easier and cheaper.
And don’t forget to buy a little extra fabric – either the same pattern or a matching pattern in the same color – and make a pillow or two to tie the whole thing together.
Also a great way to do this is http://www.chasingpaper.com , especially if you’re fickle and like to change things up a bunch or are in a rental and don’t want to worry about the walls.
I love this! I’m about to move into a new apartment and this is such a great idea to spruce up a boring space. Thank you!
This is perfect! My husband and I rent and it looks like we’ll be renting for a few years yet so need easy and removable ways to brighten up our bedroom. Will definitely be doing this for our room and maybe even a smaller one for our daughter–she’d love this, too!
Thanks for sharing!
My bf and I live in a teeny student apartment, and we did the same thing with a pretty lace curtain. We put it up with some decorator nails- instant classy focal point!
I removed my closet door to make room for my sewing table and etc, and believe it or not, they dont fit in the closet an which way! wtf math. so i put them behind my bed, standing upright and covered in a king size flat sheet and a drapy curtain! looks super similar to this and cost me nothing. woot!
I love everything about this post!!!