You can make anything really pop by adding beads, or sequins, or BOTH! Know what you want your garment to do, and you can use bead work to make it happen. For example, I’m a belly dancer, and when I go to spin on the dance floor the bead work at the hem will pull the hem out and make it flair — the weight of the beads will be affected by centrifugal force of my spin.
Here is your sweet and simple tutorial on doing bead work (and being AWESOME).
MATERIALS:
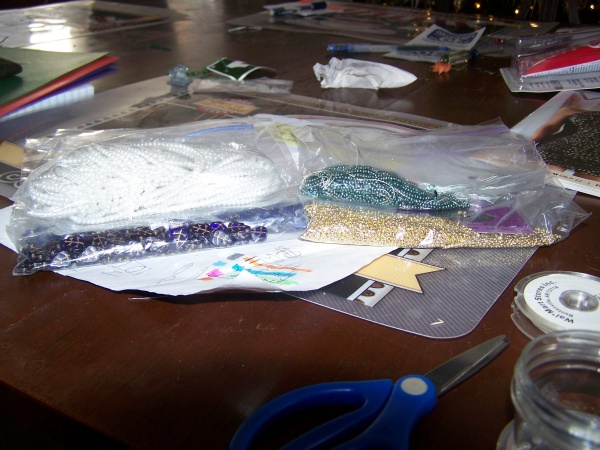
Fabric or accessory you wish to bead: fabric can be anything from cotton to poly-brocade to Dupioni Silk! You may wish to put a backing to light weight fabric to make sure the weight of the beads doesn’t tear the fabric. If you are using something like organza or silk, putting a backing on your fabric keeps it from tearing or bunching up once it’s done. Really light weight fabrics cannot hold the number of beads that heavier fabrics can. You Don’t have to use expensive fabric to make this look good! Really: I got my brocade on sale for $5 a yard!
Also realize you are adding weight to your garment. You can use this to your advantage but be careful with lighter weight fabrics (I recommend plastic pearls/sequins as they are very lightweight fabric) so that you don’t make them hang down heavy if you are looking for a light and airy flow to your fabric. However, something like what I’m making can take heavier beads and they work to my advantage.
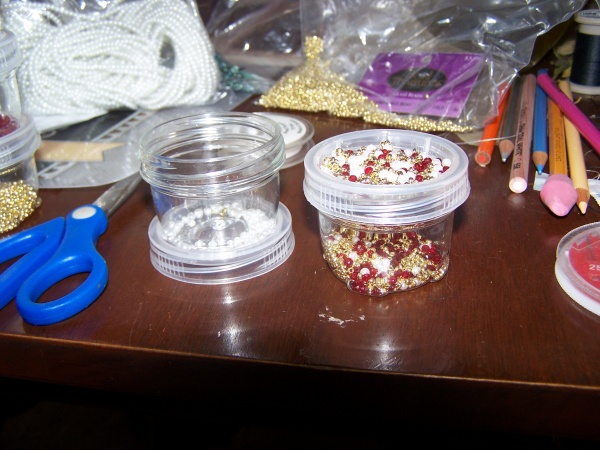
Beads: You can go to your local hobby store and get a shit-ton of beads for very little money, or you can go to a gem and mineral show and get real rocks — but they cost real dollars too! I have about $300 worth of real rock, and I’m intermingling them with an infinite supply of gold tone seed beads at about $4 per gazillion. Your choice. The less expensive ones are more likely to be able to be sewn with a regular needle.

Needles: A regular sewing needle can work, or you can go with no-bullshit beading needles. I almost can’t thread a beading needle and many beads come with a hole big enough to take a small sewing needle. Test the hole to see what you’ve got.
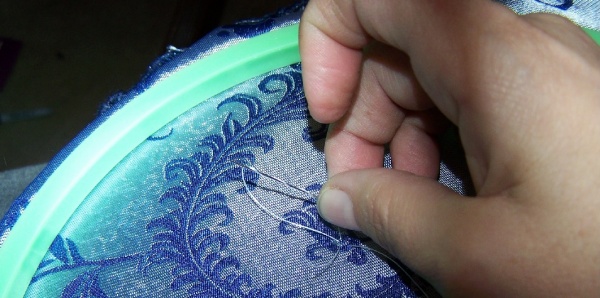
Embroidery hoop: Keep your fabric flat while you bead — you don’t want weird tension bunches in your fabric. Keep it flat and test the hang of your fabric after you do a few motifs.
Scissors: Kind of a duh thing.
RULES FOR BEAD WORK
1. Do NOT Bead your butt. Avoid bead work on the part of your outfit where you sit — that is a fast track to losing beads off your garment, or tearing your dress.
2. Do not bead where it rubs — under the arms, between the legs, or on the back where your hair hangs! Unless you are going to wear your hair up EVERY time you wear this garment avoid the back where your hair hangs. (I have a coat made from $200/yd fabric I almost never wear because the bead work is everywhere and it sucks to get my hair tangled in the bead work). I realize this is not likely an issue for many of you but if you are making/putting bling on something that you will turn into another garment once an event is done, or like me, are making something you can wear again and again, this is important. These are all fast tracks to losing bead work.

3. Do NOT go more than one inch between beads on the back. If your motifs are spaced more than one inch away from each other, tie off and cut the thread so it does not catch or make funky creases in your finished garment.
HOW IT’S DONE:
1. Figure out your pattern.
Make a Xerox of one repeat of your motif to bead, and figure out the placement of your beads and how many you will need. Count an inch of beads, figure out how many motifs you want to do, divide the beads by motifs: that lets you know how many beads you have per motif.


2. Begin beading.
Tie off thread.
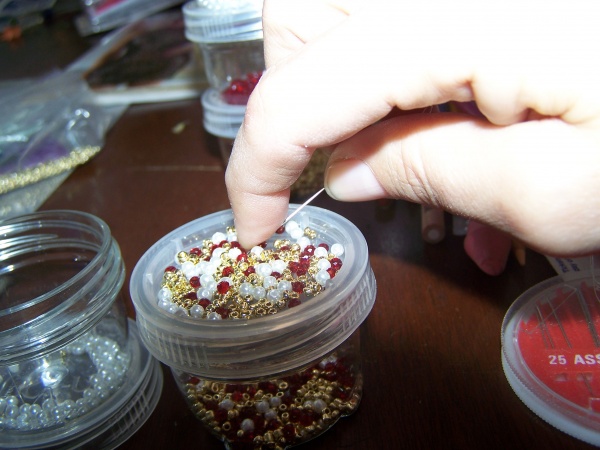
Pick your bead.

Loop back through. Go through your bead again, or at least the last bead before putting the next one on. For me this helps keep the beads line up so there aren’t threads between them, making them look off-kilter when doing a line like on the spine of the peacock.
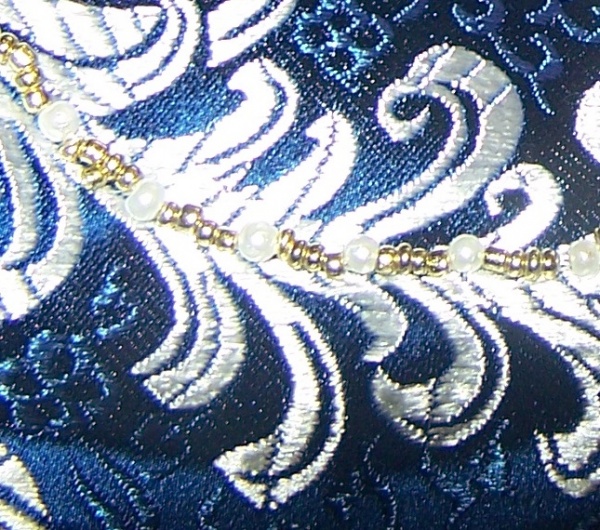
For the line of beads on the spine of the peacock: I come up, get four gold beads on my needle, go down, come up behind the last gold bead, go through that bead, get a pearl, go down, come up behind the pearl, go through the pearl, get four gold beads go down, tie a knot, come up behind the last gold bead, go through the bead, and get a pearl.
3. Go until done!
Carry it with you everywhere you go so that you can work on it any time you have to sit for any length of time. It goes surprisingly fast that way.
And that is how it’s done! Any questions? I’ll be more than happy to answer them!
You do the most amazing projects, Anthropolywog (and I can’t help commenting on how awesome your name is every time you post, as well). That last image REALLY looks incredible. I’ll have to bookmark this in case I get an itch for some pretty beadwork again. Garments are SO MUCH MORE EXPENSIVE with beads, and I’ve got no problem putting in the time myself. Thank you for sharing your wonderful tutorial!
I’m gonna have to try this! I remember many years ago I decided to add some beading around the neckline of a dress I made. I thought, “Pfffttt..How hard can it be?”
AHAHAHAHA.. the Gods of Embroidery took umbrage at my attitude. Everything I did was wonky as hell and I finally had to give up and rip it out. Hopefully your “go through the last bead again” approach will do the trick!
I was taught how to do this by a friend who has many many awards for “putting rocks on cloth.” Honestly my first project was the outer coat of my Wedding outfit. It’s Easy Peasy, but an astounding time suck. My saving grace is I’m a gamer, 6 hours every other weekend where all I had to do was sit and talk and occasionally roll dice.
This is a beautiful post. I’m definitely booking mark this, who says I don’t have time to start new projects! I really like the appeal of being able to do this with extra time (I normally just have a book) but it’s so satisfying to do something with your hands. Thanks for the inspiration!
I realized it was not a good bus project (I used to have an hour commute each way) but yeah waiting for people, waiting at doctors, role playing, sitting and listening to movies were all good places for this.
i beaded my daughters prom dress, it got to the point i was almost doing it in my sleep! there will never be another dress like it though x
Can you use lightweight fabric like batiste? Will the dress sag because of the weight of the beads?
Very good article. I definitely love this website.
Continue the good worк!
I am a novice, self taught beaded. . My grandaught’s mom bought her a dress for homecoming last year. It has a magince mage lace bodice. No real color, no caricature at all. I was going to add some plastic beads to it. However, am very unsure if the “lace” will hold them. This dress so needs help. I know seed beads will not work. Thank you. Blessed Be.
If smaller things won’t work you could go with sequins and seed beads, or larger beads like you are thinking. If the lace is to delicate to put large beads, then sequins and seed beads are an option. the seed bead is mainly to keep the sequin in place. Come up through the hole in the sequin, go through the seed bead, come down through the hole in the seed bead and down through the material. That way you get more sparkle but sequins and seed beads aren’t heavy like larger beads.
Thank you for a great explanation. I was looking online for a similar idea and really appreciate it
DIGITIZING SERVICE
Do you bead the fabric before sewing the garment or after?