
My last few meals of the challenge were… interesting. Remember when I said that I wasn’t just bad at making food, I also have bad luck in the kitchen? Yeah, there were some bad luck moments that had NOTHING to do with me at all. There were also some miscalculations and dumb-ass moves that had EVERYTHING to do with me. Ooh, I also cheated on one meal with a professional, and there is one final meal video with a special guest star…
Breakfast
Friday morning I prepared to make oatmeal, but this is as far as I got…
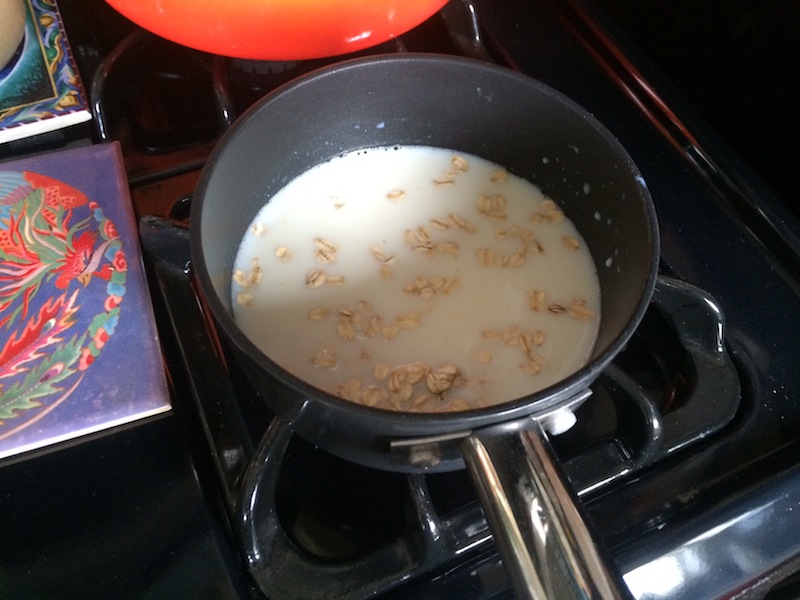
…before I realized that my oven had broken down. No power, no fire. Nada. Le sigh [times] eleventy. I was SO ready for this challenge to be over, but I had two more meals to go. So I called the apartment manager to fix my oven and went on with my day.
Lunch
Amy, my aforementioned professional chef neighbor (she of the huge-ass skillet-lending), was visiting me around lunch time, so she asked “what’s for lunch?” The answer was the “Greek-ish salad,” but I mentioned that I was feeling so damn tired that I didn’t even want to make it. Amy popped up and said, “that’s ridiculous. Let’s make it right now.” Yup, I cheated. I allowed a professional chef to make lunch. And, oh! You should have seen her, it was a thing of beauty.
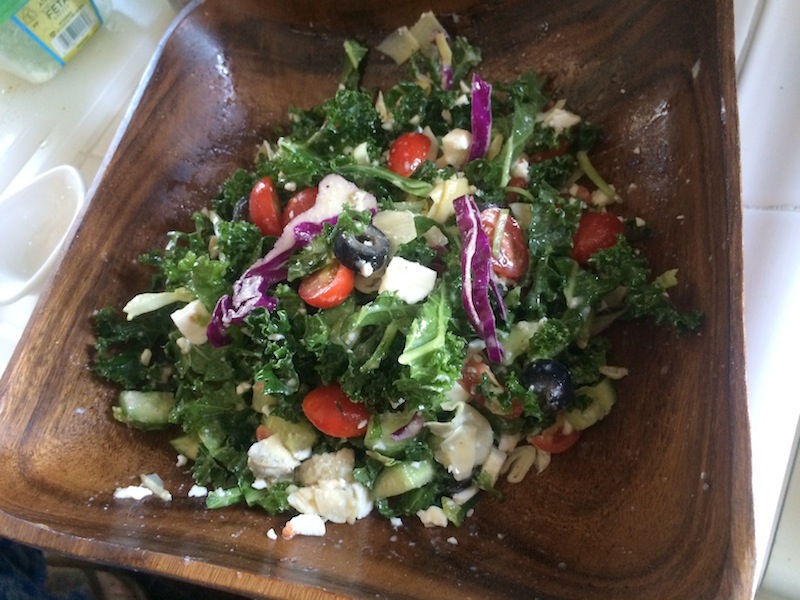
The way she cut the Persian cucumbers was, like, lighting quick. Pew pew pew — cut and chopped. And then she would just cut and toss the tomatoes into the bowl in almost one swift movement. Like a finely choreographed dance it was, and with a recipe she just listened to me read off. I didn’t even give her measurements for the dressing — she just winged it and it was perfection.
As reparation for my cheating, I made this salad again for lunch the next day. And I found myself imitating Amy’s cucumber cutting technique. So, you know, at least I learned something from my sneakiness.
Dinner
Since my oven broke, thank gawd the last evening’s meal was to be made in a slow cooker. The only problem… I have the the worlds tiniest slow cooker:

So the roast I bought wouldn’t fit inside of it. I hacked away at that raw piece of meat, making this face the entire time, until I could get a small enough chunk. Then poured in the cranberry, and grabbed the sweet potato and realized…

Luckily I had bought a smaller regular potato too, just in case that guy I married wanted to have this for dinner. And that little guy fit right in. Then all that was left to do was to plug it in and wait. Yup, there’s not even an on or off button on the little slow cooker. So I just had to wait and see if it would get hot. It did. Then six hours later, BOOM! I had one of my favorite meals of the challenge. I actually made fucking meat! And it was goooood. I will definitely make that again. I may even invest in a larger slower cooker so that I don’t have to re-butcher raw cow meat on my counter-top.
Bonus dinner video from Day 4
Some of you have been noticing that I have become a little more confident in the kitchen this round. (If you can believe it.) That’s entirely because my friend Jessica (the creator of almost all the recipes in this challenge) has been cooking me dinner at her house once a week. And she lets makes me help sometimes. On our official “dinner night” I thought that I would go over to her house as usual, but I would make her dinner for a change.
Here’s how it went down…
So yeah, the lasagna would have been awesome — it seriously is a good recipe — but maybe next time I’ll buy pre-grated cheese, and make sure I have the right amount of everything.
Overall results
This year’s challenge was in some ways harder and in some ways easier than the first challenge. I had learned a lot from the first challenge, and from my weekly dinners with Jessica. But that confidence boost led me to believe that I could sail through this challenge, which threw me off. I also experienced a lot of bad luck, what with the oven breaking, and the pepper debacle, and the dog sneakiness, and the tiniest slow cooker in the world.
The first challenge had much harder recipes, as Cat (the founding editor of Offbeat Home) had truly no clue how inept I was in the kitchen. The recipes this time were a lot easier, since Jessica is keenly aware of my limitations. I think, no, I will definitely add a lot of them to my repertoire.
What about you guys? Did you find recipes that you’ll be using again? I hope so.
Having a little more experience under my belt this time around meant that I got to fail in different ways than last time. While in the first challenge I was just struggling to understand how to cut an apple, I learned things in this one like: I need to read the whole recipe first, I need to double check ingredient amounts before I leave the grocery store, and ALWAYS pre-heat the damn oven first. Oh, and don’t fuck with pepper.
I also hear that you guys want more cooking videos from me. No problem! I actually really like making them, and they make cooking more fun. So I’ll try to do maybe one a month? But I need y’all to keep submitting recipes for me to try!
I hope you had fun with me on this journey to get more experience with foods that aren’t frozen. I learned a lot from your comments and felt majorly encouraged the entire time. Y’all were there for me when morale was low (two-hour breakfasts), answered questions during freak outs (day-old cheese?), and made me feel amazing when I accomplished even the little things (taco salad!). So I want to say a big ol’ huge-normous THANK YOU. I love you guys so much. Seriously, THANK YOU for being readers, supporters, submitters, and Homies. I don’t know what I would do without y’all in my life.
Yay! I’m glad we didn’t traumatize you with a weeks worth of cooking so bad that you never wanted to do it again. I think the monthly cooking videos will be awesome. And yes, don’t fuck around with pepper.
Pesto: how to fool people into thinking you’re an amazing cook.
– lots of fresh basil leaves (I hear OBH has a great post on growing mad giant basil) – maybe 3 cups
– pine nuts or walnuts – maybe 1/2 cup
– parmesan cheese – maybe 3/4 cup
– olive oil – maybe 1/2 cup
Stick everything in a blender/processor and press the button. Boom! Deliciousness! Freeze extra in ice cube trays.
Thanks for taking us along on this challenge! It takes an awesome person to let the whole internet see your challenge areas. I don’t think many of us would have the guts to do that. We’re super duper proud of you. 🙂
D’aw. I love hearing that you’re proud of me. Super-duper even! Thanks, Alissa.
Yep, it’s that easy!
I’d add generous amounts of garlic and a pinch of salt.
Basically, it works with any kind of nut you like – peanut, brazil nut, almond… My favorite is cashew!
Definitely garlic! Lots of garlic! You can get away with subbing in other leafy-green things (e.g. mint, spinach, kale, green garlic) for some or all of the basil, and if you’re feeling cheap you can omit the nuts. If you’re feeling super-cheap, or have a dairy sensitivity, you can also get away with adding salt instead of the cheese. My typical pesto is just basil, garlic, olive oil, and salt, to taste, run through the food processor; extra freezes well — I like to just do it in lumps on a cookie sheet lined with parchment paper (we call them PLOPs — Portioned Lumps Of Pesto)
Ah yes, garlic! I forgot that part because I’m allergic so it never goes in. Some garlic would make that extra yummy! 🙂
Yes, kale pesto is an easy and tasty way to get some leafy greens in your pasta. I like mixing it about 50/50 with regular marina/red pasta sauce.
Also, Megan, you’re awesome and I love the videos.
While I realize that a massive chunk of the fun of The Offbeat Cooking Challenge is torturing you for three meals a day for an entire week, I think one a month would be more do-able for you and everybody.
Totally this! I learned to cook in college when I was only responsible for helping cook on a team of four once a week, and had to plan the meal once a month. And that was with experienced cooks on my team, someone else buying all the food and making sure all the multiplications were right, and all the necessary equipment around! Even now I hardly do more than boil water or steam/stir-fry something a few times a week.
I think a once-a-month followup sounds awesome. I’d love to see how you do with the no-bake pie I sent!
Oh yeah! I could make some of your bonus desserts for a few vids. RADsauce.
…and everybody.
TRANSLATION: PLEASE FOR THE LOVE OF GOD STOPPIT WITH THESE POSTS SRSLY.
😉
HAAA. I actually meant that I had originally hoped to cook along, but I just felt like it was totally unpossible for a lot of reasons. (Which isn’t that supposed to be the point of The Offbeat Cooking Challenge–that cooking for yourself can be done by anyone?) Even with advanced notice of the upcoming recipes, I couldn’t get my shit together to make any of the meals happen. One meal a month with advanced notice–I might be able to cook along.
But considering Julie’s confusion, I am wondering if more people are just totally confused about what’s happening if they’re infrequent readers.
THIS
Totally planned to cook along. Mostly failed. Even with advance warning. I think I did one complete meal and then bits and pieces of other meals. I did however manage to squeeze the full ration of guilt out of the experience however. So… thumbs up there.
I love Megan’s videos but it makes me a little uncomfortable to see her pick up the “food hammer” and haul it to the
rock quarrygrocery store every day. I don’t like feeling like I might have put that on her. Also, I like to live in my over-privileged bubble without too many reminders that I can’t even manage to make nutritious meals from abundantly and easily available foodstuffs to jam into my cakehole 3 times a day.Once-a-month sounds like a good balance between “ha ha so funny” and “argh so stressful”.
Oooo, do you like salad croutons? I love them. (Although they are nearly impossible for me to eat with grace in restaurants. My method is: spear and load a forkful of salad, scoop up a crouton separately, munch!)
Anyways, you should make some. They’re delicious; my partner snacks on them straight from the bowl, like chips.
1. Buy some white crusty bread, like cheap “French” or “Italian” from the grocery store bakery. Preferably pre-sliced. Don’t get fancy with it; originally croutons were made with stale bread.
2. Toast at least six slices.
3. Pre-heat the oven to 350˚F/180˚C while you’re doing step 4.
4. On a big cutting board, lay the toast slices flat and cut into 1cm/0.5in squares using a sharp knife. Just approximate the squares’ size based on restaurant croutons. No rulers needed! I usually cut the slices into strips, then cut across the strips to make squares. Lay the squares on a baking sheet covered in parchment paper or foil.
5. Melt 50g/3 Tbsp butter in a small bowl in the microwave in 15 second increments. Watch it like a hawk, or you will have to clean the microwave. Alternatively, plonk the small butter bowl inside a larger bowl with some boiling water in the bottom (“bain-marie”).
6. Add into the melted butter: one large spoonful of garlic powder (1 Tbsp), one small spoonful of Italian seasoning (bit of basil, oregano, pepper, thyme), a little bit of salt and pepper.
7. Using a big spoon, ladle the butter mixture all over the squares that are spread on the tray. You’ll need to stir the mixture as you go, because all the good stuff sinks to the bottom of the bowl.
8. Mix the squares around so they’re evenly seasoned and spaced on the tray.
9. Bake for 20 minutes. If they’re not crunchy and brown on the edges, bake for another ten minutes, but watch out for burning. You might need to stir them up on the tray so that they get crunchy on all sides.
10. Let them cool on the tray. Watch out for thieving puppies & partners.
11. Enjoy with a big salad and some vinaigrette or Caesar dressing!
I love that you added “No rulers needed!” Because I’m totally the type to follow the recipe to the fucking letter. “There’s probably some SUPER IMPORTANT reason that it needs to be exactly 0.5 inches!” No seriously, Jessica had to keep reminding me that “cooking isn’t chemistry, it’s more like painting.”
Ha! Figured. As I was writing the numbers I was thinking, “Oh, better write a note so she doesn’t stress out if some of them are wonky…”
As a musician, the fine balance of rules and instinct in cooking really appeals to me.
When it comes to food making, the most important thing to distinguish is if its baking or cooking.
When you’re baking something, it is a lot like chemistry, and following the recipe to the letter is important (unless you’re an experienced baker prepared for potential experimentational fallout, or a lazy teenager who apparently has a cake thumb and can never do wrong).
When cooking, you generally have a lot more leeway in terms of changing things based on what you have on hand to use or what your personal preferences are. Sometimes changes will turn out bad, sometimes they’ll turn out amazing. But thats just how things come out – even the best cooks will come out with duds sometimes. There is a lot of trial and error in figuring out how to make foods you like.
This is the best video yet! Hopefully Jessica will agree to guest star more often.
“Let’s just drink”
Oh, Jessica has already volunteered to be a guest star again. Me thinks you shall be seeing more of the dynamic (and drunk) duo. 😉
Megan, I have a super easy Indian recipe for you to try. I know you’re not into spicy so you can temper it to please you. This recipe is also vegetarian!
Aloo Gobi Mutter (Literally potato, califlower, peas)
1 head of califlower cut up into bite size pieces
1-2 large baking potatos peeled and cut into cubes
2- 14oz tin of diced tomatoes
1-14oz tin of peas drained or frozen peas also work
1/4 teaspoon tumeric *stains wooden/plastic utensils*
chili powder to taste
salt to taste
2 tablespoons of ginger garlic paste (you could lessen this too if you want to cut out some of the heat)
1 medium onion chopped
oil
1. cut up all your ingredients
2. put 1-2 tablespoons of oil into hot pan
3. add ginger garlic paste and onion, cooking till onions are translucent
4. put in your chili powder, tumeric, and salt
5. put califlower and potato into pan, cook till soft
6. add tin of tomatoes and peas, heating till all ingredients are hot
7. eat! you can serve it over rice or with chapatis but I prefer it on it’s own.
I’m a nervous cooker, too. So I have been trying hard lately to do new things. Basic things. Like this recipe:
Little yellow potatoes from Trader Joe’s.
Frozen brussel sprouts (could use fresh, too) from Trader Joe’s.
Bratwurst (but could be any meat, or non-meat you want).
Halve the potatoes.
Halve the brussel sprouts (unless frozen).
Mix in a bowl drizzled with olive oil and your choice of seasonings (I use black pepper, salt and oregano, and some pre-jarred crushed garlic). Mix it all together.
Put into baking dish (like one you used for lasagna).
425 for about an hour.
I cook up the sausages on the grill, cut them into pieces and then mix it all together with the potatoes and brussel sprouts at the end. I sprinkle shredded parmesan cheese on it. And one time I scrambed eggs into the mix. It’s super hearty and turns out a lot like those potato skillet dishes you might get at a diner. Yum. And easy.
I’ve also gotten crazy and added peppers before. Or mushrooms. Or onions. I know, I live on the wild side. So far I haven’t managed to ruin it and I’ve made it at least 5 times. So I feel good about that 🙂
I have completely fallen in love with you Megan!!!
good work!
I have a super-delicious, and easy, and vegan, recipe for you. It’s not mine -it’s from Kalyn’s Kitchen, but seriously, it is so good. (don’t be intimidated by all the ‘steps’ – basically it’s saute veggies with garlic, boil lentils, add tomatoes and seasonings. serve with lime and cilantro.)
Tip – it calls for a few spices – you really just need the cumin and chili powder. If you don’t have celery, use a green pepper, or a red pepper. Seriously, i interchange them in this recipe depending on what i have. (like is says a can of Roasted Tomatoes – i just use a large can of normal diced tomatoes.)
And, use lots of lime juice.
it is really forgiving, and pretty much impossible to mess up.
http://www.kalynskitchen.com/2010/01/recipe-for-mexican-red-lentil-stew-with.html
If you run into the ‘not enough sauce’ in future, here’s how to solve that problem quickly:
When your jar is almost empty, fill it 1/4 to 1/2 full with water, give it a swish to get the last sauce remnants all mixed in, and pour over your top layer before adding the last of the cheese.
It should add enough extra liquid that your noodles will cook. At worst, if you overdo the water, it waters down the tomato-y flavour, but at least then you’re eating cooked noodles with mostly cheese.
You’re a fucking genius.
If it’s a tomato pasta sauce, you can swap out the water for red wine. 😀
Which Megan is far more likely to have on hand than spare sauce!
Handy tips for dealing with meat:
Since its always best to freeze any portions of meat you aren’t going to use within a few days after purchasing it, a good habit to get into is that as soon as you get home from the market (or as soon as you have time to), portion the meat out while it’s still pliable and un-frozen. Separate portions into individual packages, things like freezer-safe ziplocs can work well, since it’s fairly easy to force extra air out of the bag, an important step to prevent freezerburn. (A regular sandwich size ziploc holds about 1-2 lbs of ground meat, a medium freezer bag can hold the same in cuts like chicken breasts, depending on how stuffed you make it). Keep whatever you’re going to use out, and freeze the rest of the portions immediately.
When you need it, take the portion you need of frozen meat out and leave it in the fridge for a day or so if it’s about 1-1.5lbs (more time is needed for the larger the portion – this definitely encourages planning your meals ahead of time!). Since you’ve already portioned it, you don’t have to worry about thawing and refreezing extras, or trying to hack at frozen meat.
If you forgot to take it out and need to quick thaw it, make sure the vessel holding the meat is water-tight, then place it in a bowl of cold water for a few hours, making sure the water stays cold, or keeping cool running water over it. If you ever thaw your meat in the microwave or by leaving it on the counter in a warm room, you MUST use that meat soon and properly cook it, as it is no longer safe to re-freeze it. If you thaw in the fridge or in cold water, it is safe to re-freeze, though repeated thaw-freeze cycles can lower the quality of the meat.
Beef, pork and chicken and most fish all can handle freezing pretty well in general. I haven’t done it myself, but I’ve heard of bison and venison being stored similarly. If stored this way, you can easily keep your meat around for several months or longer, depending on the cut, which means you could buy a larger amount at one time (say, if it’s on sale), portion and freeze it, and not have to deal with buying or portioning meat for a month or more.
This kind of method can definitely make meat cooking less of a task, as all you have to do is peel open a ziploc and dump it in your pot, no having to touch icky raw meat every time you cook. (As much as I am a meat eater, I do not like raw meat’s texture. I’d rather deal with it all at once every couple of months than every dang time I want to cook something with meat.)
And an extra tip – if you’re buying meat in a place where the outside is warm and it may be a short while before you make it home to your fridge, your best friend will be a small cooler in the trunk of your car. If you’re like most people who don’t drive around with coolers all the time, a good alternative is a cardboard box – the cardboard will be a decent insulator for a short period of time. If you have any blankets in your car (a good thing for emergencies as well) you can wrap those around any cold foods as well.
Who knew there was so much to know about handling meat?
You’re amazing, Megan! And such yummy simple recipes!
I leave mine for your perusal:
CURRIED LENTIL DHAL
1. Fry half a chopped onion with some chopped garlic until soft.
2. Add curry paste according to taste and fry for about 30 seconds more (and try not to inhale, cooking curry powder will make you cough). – I often use thai red curry paste, but have also used things like cumin and garam masala, just whatever curry stuff I have on hand.
3. Add half a cup of dried split red lentils and fry for a further minute.
4. Add 1.5-2 cups of stock (or water, depending on preference), and simmer until the lentils are soft and mushy. You can add more water/stock if it has soaked it all up and they’re not quite done yet.
5. Add half a tin of coconut milk/cream and simmer for another few minutes.
Done.
I usually have mine with a couple of toasted garlic pita breads for scooping/dunking (they come in a packet frozen, I put them in the toaster. 3minutes at done woo!).
Easiest thing to cook? Dried beans!!! With a 2 lb bag, my husband and I can make meals for the entire week with very little effort.
Basically you just soak beans overnight (or starting early in the morning if you want to cook it for dinner) for at least 6 hours. Put them in a big bowl and cover them with plenty of water (more than you think, as they’ll soak up the water) and a splash of vinegar. It’s sometimes good to check on them to make sure they are still covered with water throughout the day.
Then come cooking time, you put them in a big pot on the stove, bring them to a boil, then simmer for around an hour. Cook some rice, gather some avocado, cheese, and salsa, and feast!
I was really eager to follow along with the challenge when I first got the recipes ahead of time. But I ended up not making any of them! What would have been sooo helpful is a full shopping list with all of the ingredients for the week. That likely would have helped Megan too since she wouldn’t have been running to the store all the time, if all of the quantities were laid out ahead of time. It could have been split up into two trips if there were perishables at all. I probably would have substituted some of the stuff with similar things we already have, and that would have been easier to figure out from looking at one long list of the week’s ingredients rather than going through each recipe individually. Just a thought!
Yep, girl crush is official… Megan, you rock, and I loved Jessica as a guest, so funny… 🙂
I cant wait to see some more! (I may be a little addicted at the moment)… 🙂
Also as a sidenote (and probably a dumb question), which category to we submit recipes under submissions?
I love official girl crushes. SO much better than the official kind! WOOT!
Okay, so you can just click on “submit a guest post” or just click here for the recipe submissions: http://offbeathome.com/submissions/post and select “food” or “recipes”
I’m thinking to may have good luck with store-bought baking mixes. Mostly the mixes just have things like flour and baking soda pre-mixed, then you add things like eggs, milk & melted butter. I really recommend cornbread box mixes, they often have recipe variations included on the box, so you can keep trying something new until the mix is used up.
Congrats on finishing the challenge sweetie! If you’re up to it, I have a really easy Italian recipe for you to try out soon. =)
Mostaccioli:
Ingredients:
1 box of pasta (spiral, zitti or mostaccioli – anything that resembles small, little mac and cheese pasta).
1 lb ground beef
1 jar of spaghetti sauce (I really like Prego or Classico)
2 cups shredded mozzarella cheese
optional: 1 tablespoon sugar and italian seasoning
1 casserole pan
1 large skillet
1 pot
tin foil
Directions:
1. Put ground beef in a large skillet and cook on medium heat. Use a flipper to chop up the ground beef into small bite size pieces as it cooks (it usually crumbles a bit). When it’s browned, drain the grease. Use the lid of the skillet to drain the grease out into an old jar. Afterwards, place back on the stove top.
2. Pour pasta sauce over the ground beef and stir. Cook on very low heat.
Side note: If you would like, you could switch up the sauce by adding a table spoon of sugar and a quick dash of italian seasoning. This totally isn’t necessary, but I usually like a sweeter sauce. =)
3. While the sauce is heating up, fill a pot with water halfway. Place on the stove top on high heat, add a dash of salt and bring to a boil. When boiling, pour in the entire box of pasta. Stir every once in a while, and cook about 7 minutes. Use a fork, and taste one of the pasta noodles. It should be semi firm (al dente). Another test is to throw it against the wall. If it sticks, it’s good. LoL If not, then cook for a few minutes longer and then test again.
4. Drain the pasta noodles into the sink. You can use a colander or the lid of the pot. Afterwards, pour the noodles in the skillet with the sauce and meat. Stir to mix and remove from heat.
5. Pour everything into the casserole dish. Cover with tin foil. Bake at 350 for 15 minutes.
6. Remove the casserole dish, place on top of the oven and carefully take off the tin foil. Next cover with cheese. Place back into the oven for 10 minutes uncovered.
7. Remove from oven, let it rest for 10 minutes and then nom away!
*** If using gluten free noodles: after draining the cooking water, make sure to run the pasta noodles under cold water for a few minutes before adding it to the casserole with the meat sauce. It stops the cooking, and keeps it from getting soggy.
*** Veganize this by substituting the ground beef for meatless ground beef and your favorite vegan cheese.
http://www.amazon.com/Reluctant-Nervous-Confused-Students-Cookbook/dp/0883965917/ref=sr_1_1?s=books&ie=UTF8&qid=1403229147&sr=1-1&keywords=college+student%27s+cookbook+joshua+lambert
I recommend this book for any cooking n00b. It is Megan Simple. “This is what julienne means.” “Here is a list of things you should just HAVE in your pantry.” It was written for people with no idea what they’re doing and is much more a cooking 101 textbook than a cookbook in the traditional sense. Check it out!
Another good one (with how to videos too) is Learn to Cook by Hilah Johnson. I’m an suitable home cook but have still learned a bunch from her and find her super fun to watch.